Postman Collection V4
We are continuously improving our APIs, and the Azuga Postman Collection (V4) is updated whenever new APIs or enhancements are released.
Before getting started, please ensure you are using the latest version of the Azuga V4 Postman Collection to avoid authentication or request issues.
Steps to Get Started with Azuga V4 Postman Collection
Step 1: Download the Azuga V4 Postman Collection
Download the latest Azuga V4 Postman Collection from the link below: Azuga V4 Postman Collection
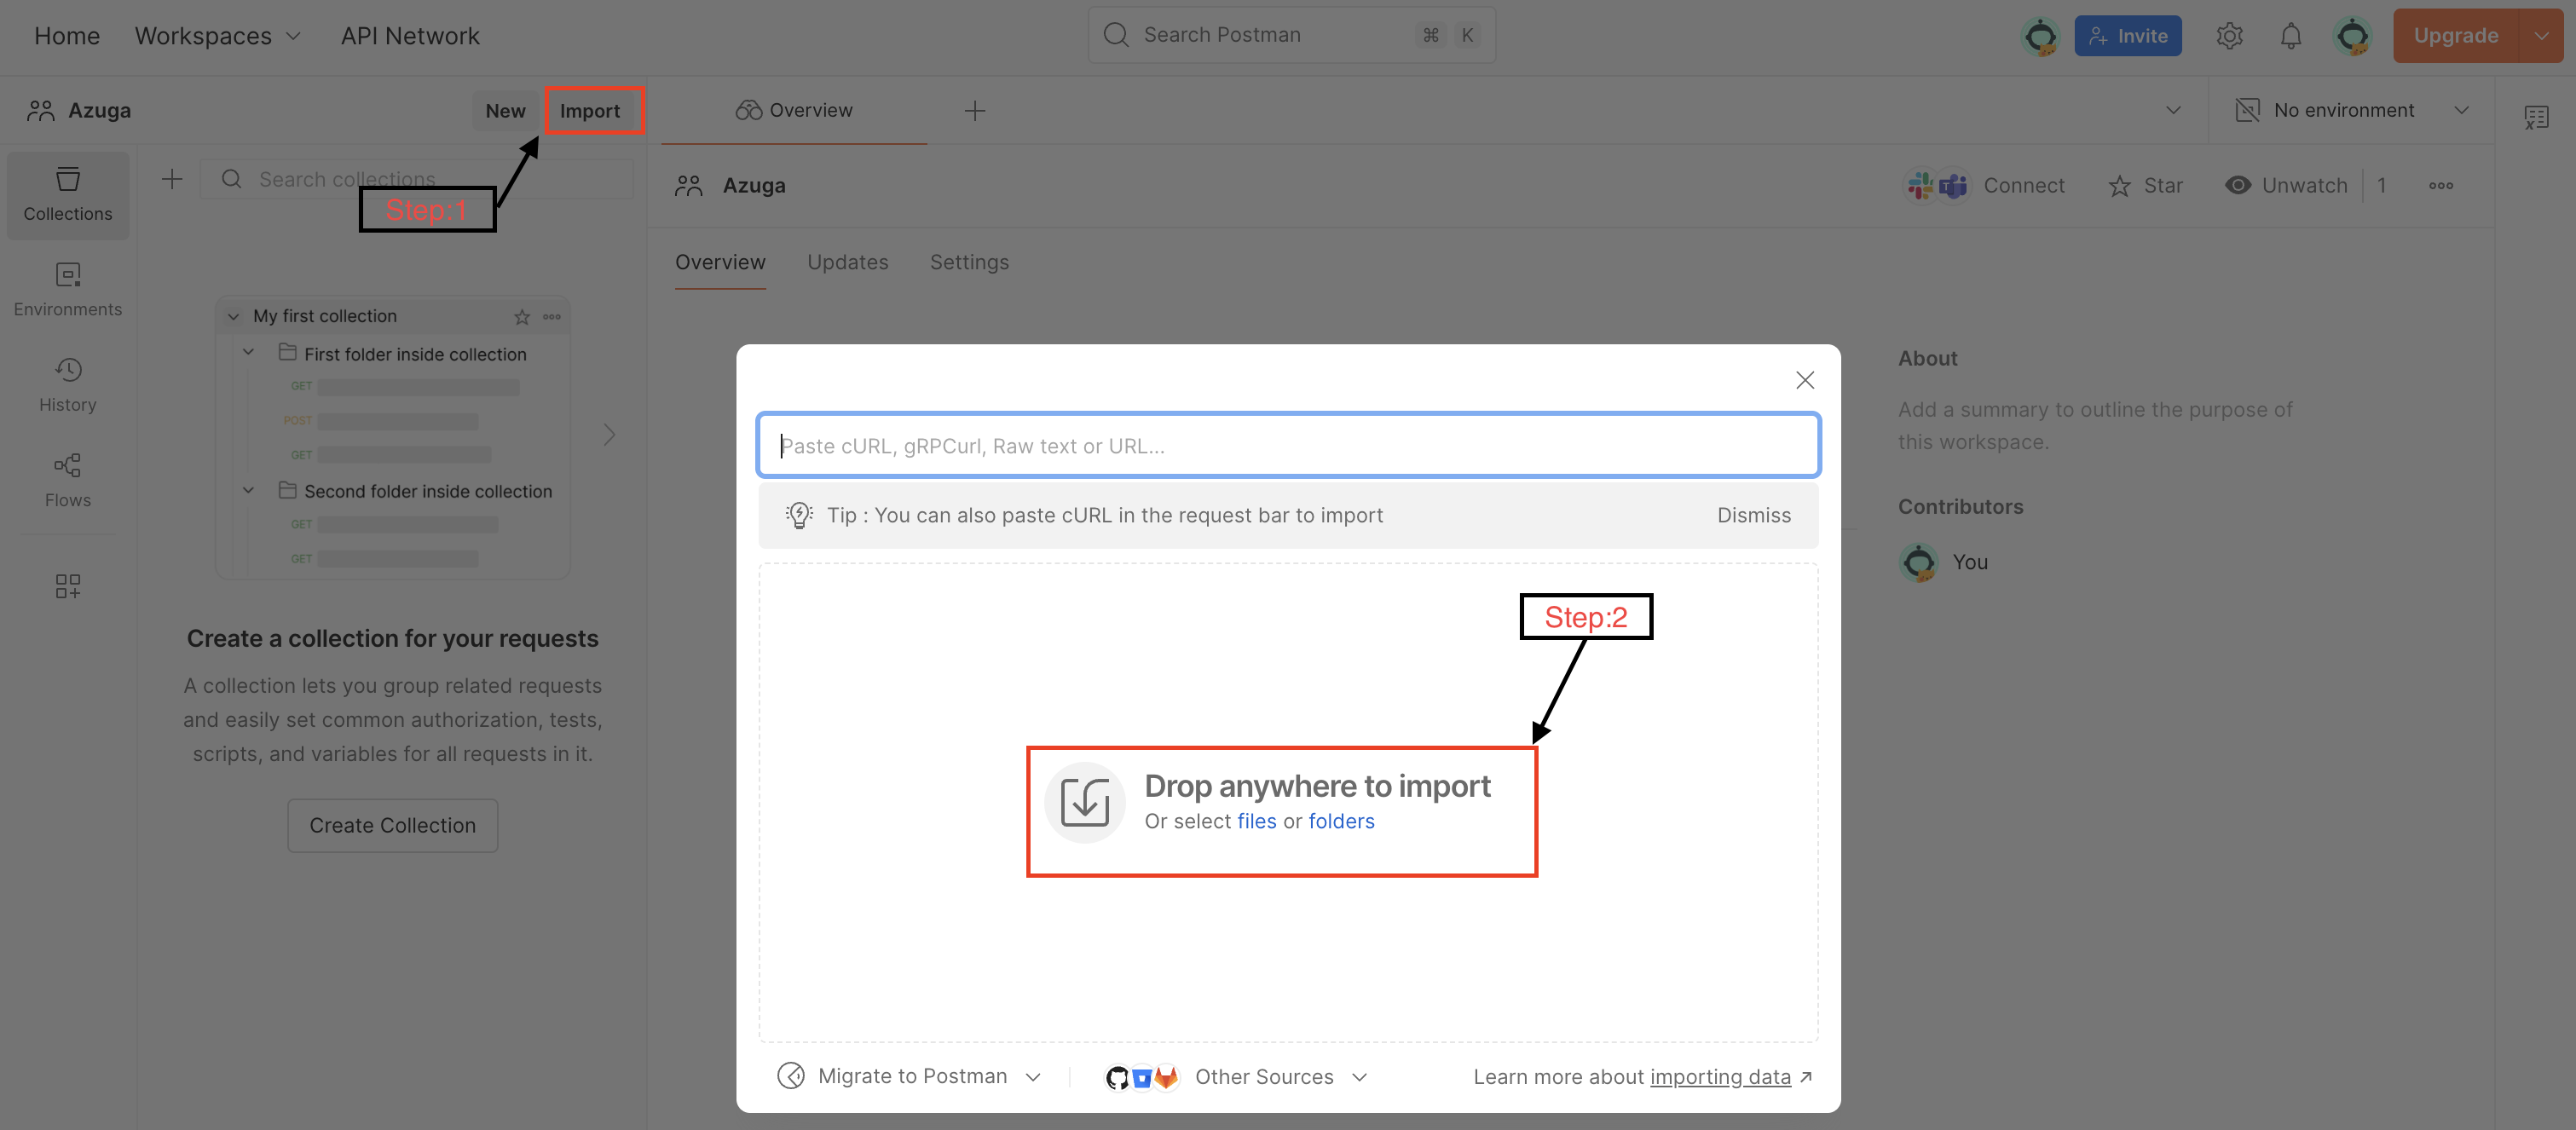
Step 2: Import the Collection into Postman
- Open Postman.
- Click on Import.
- Drag and drop the downloaded Azuga V4 Postman Collection file or Click Upload Files, select the file.
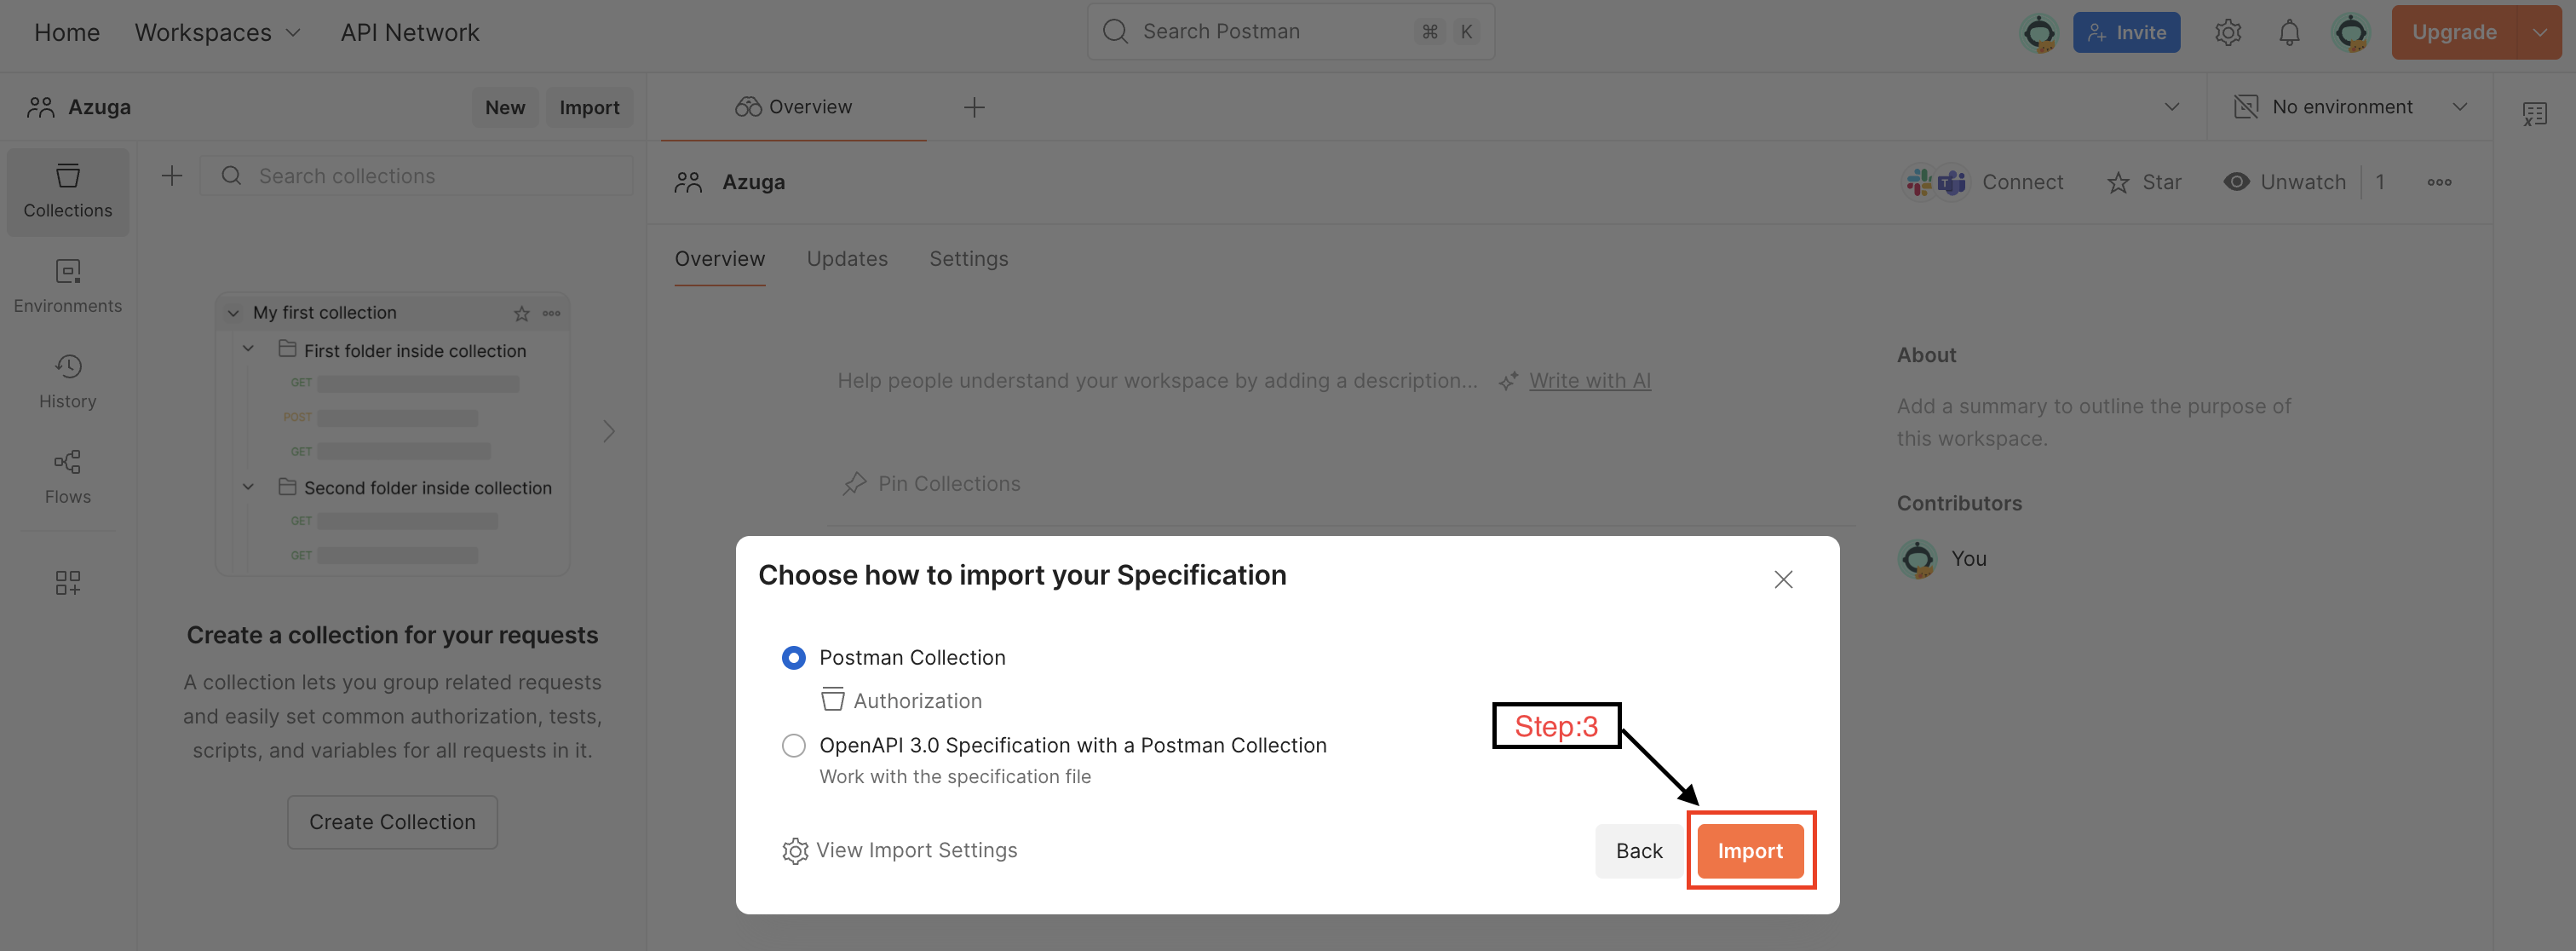
- Click Import.
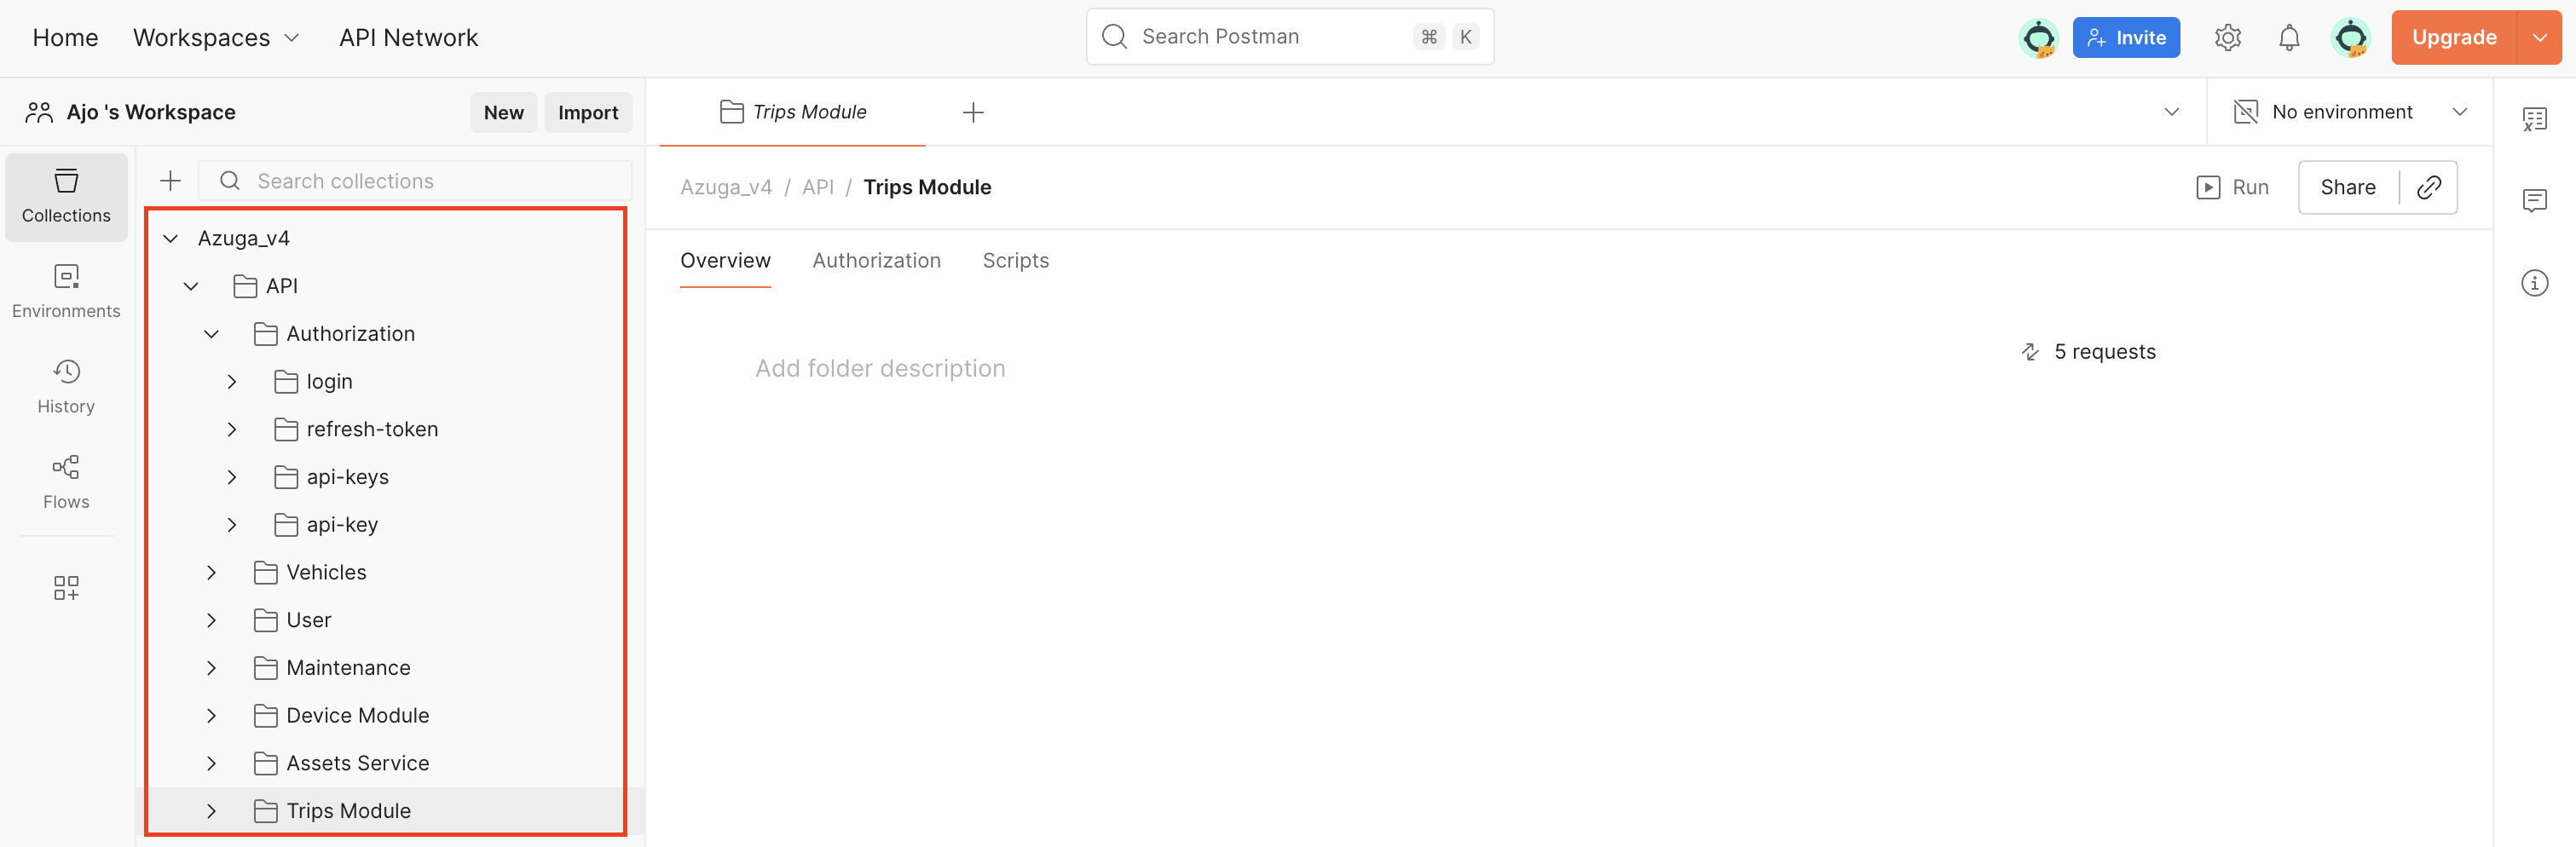
Step 3: Verify the Imported Collection
Once imported successfully:
- You will see the collection named Azuga_V4
- Expand the collection to view available API folders and requests
Step 4: Configure Collection Variables
- Click on the Azuga_V4 collection.
- Navigate to the Variables tab.
Some variables are pre-configured and should not be modified.
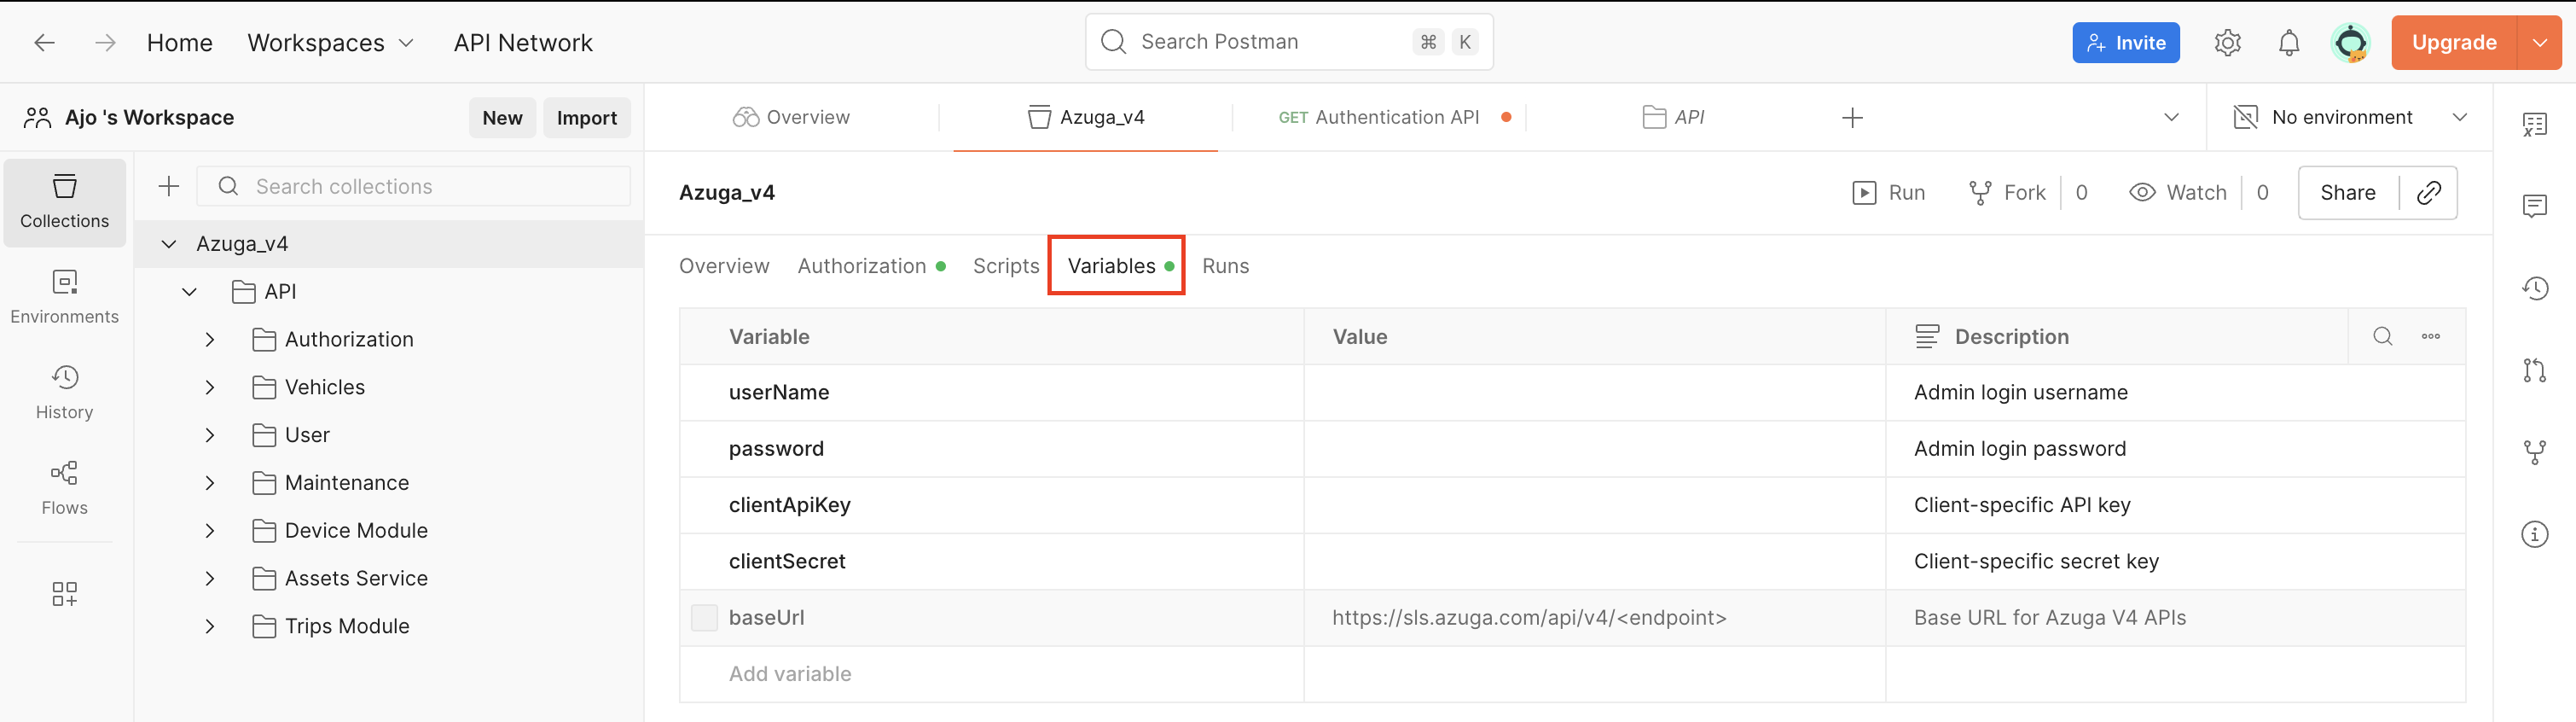
⚠️ Important: Do not change any pre-defined variables unless explicitly instructed.
Step 5: OAuth 2.0 Authentication (V4)
Azuga V4 APIs use OAuth 2.0 based authentication, which is already preconfigured in the Postman collection.
- To generate the access token, navigate to the Authentication API: Authorization → login → Authentication API
- Click on the Authorization tab and verify the following configuration:
- Auth Type: OAuth 2.0 and Add authorization data to: Request Headers.
- Header Prefix: Basicand Combine the username and password using a colon (:). Encode the combined string using Base64. You may use any Base64 encoder.
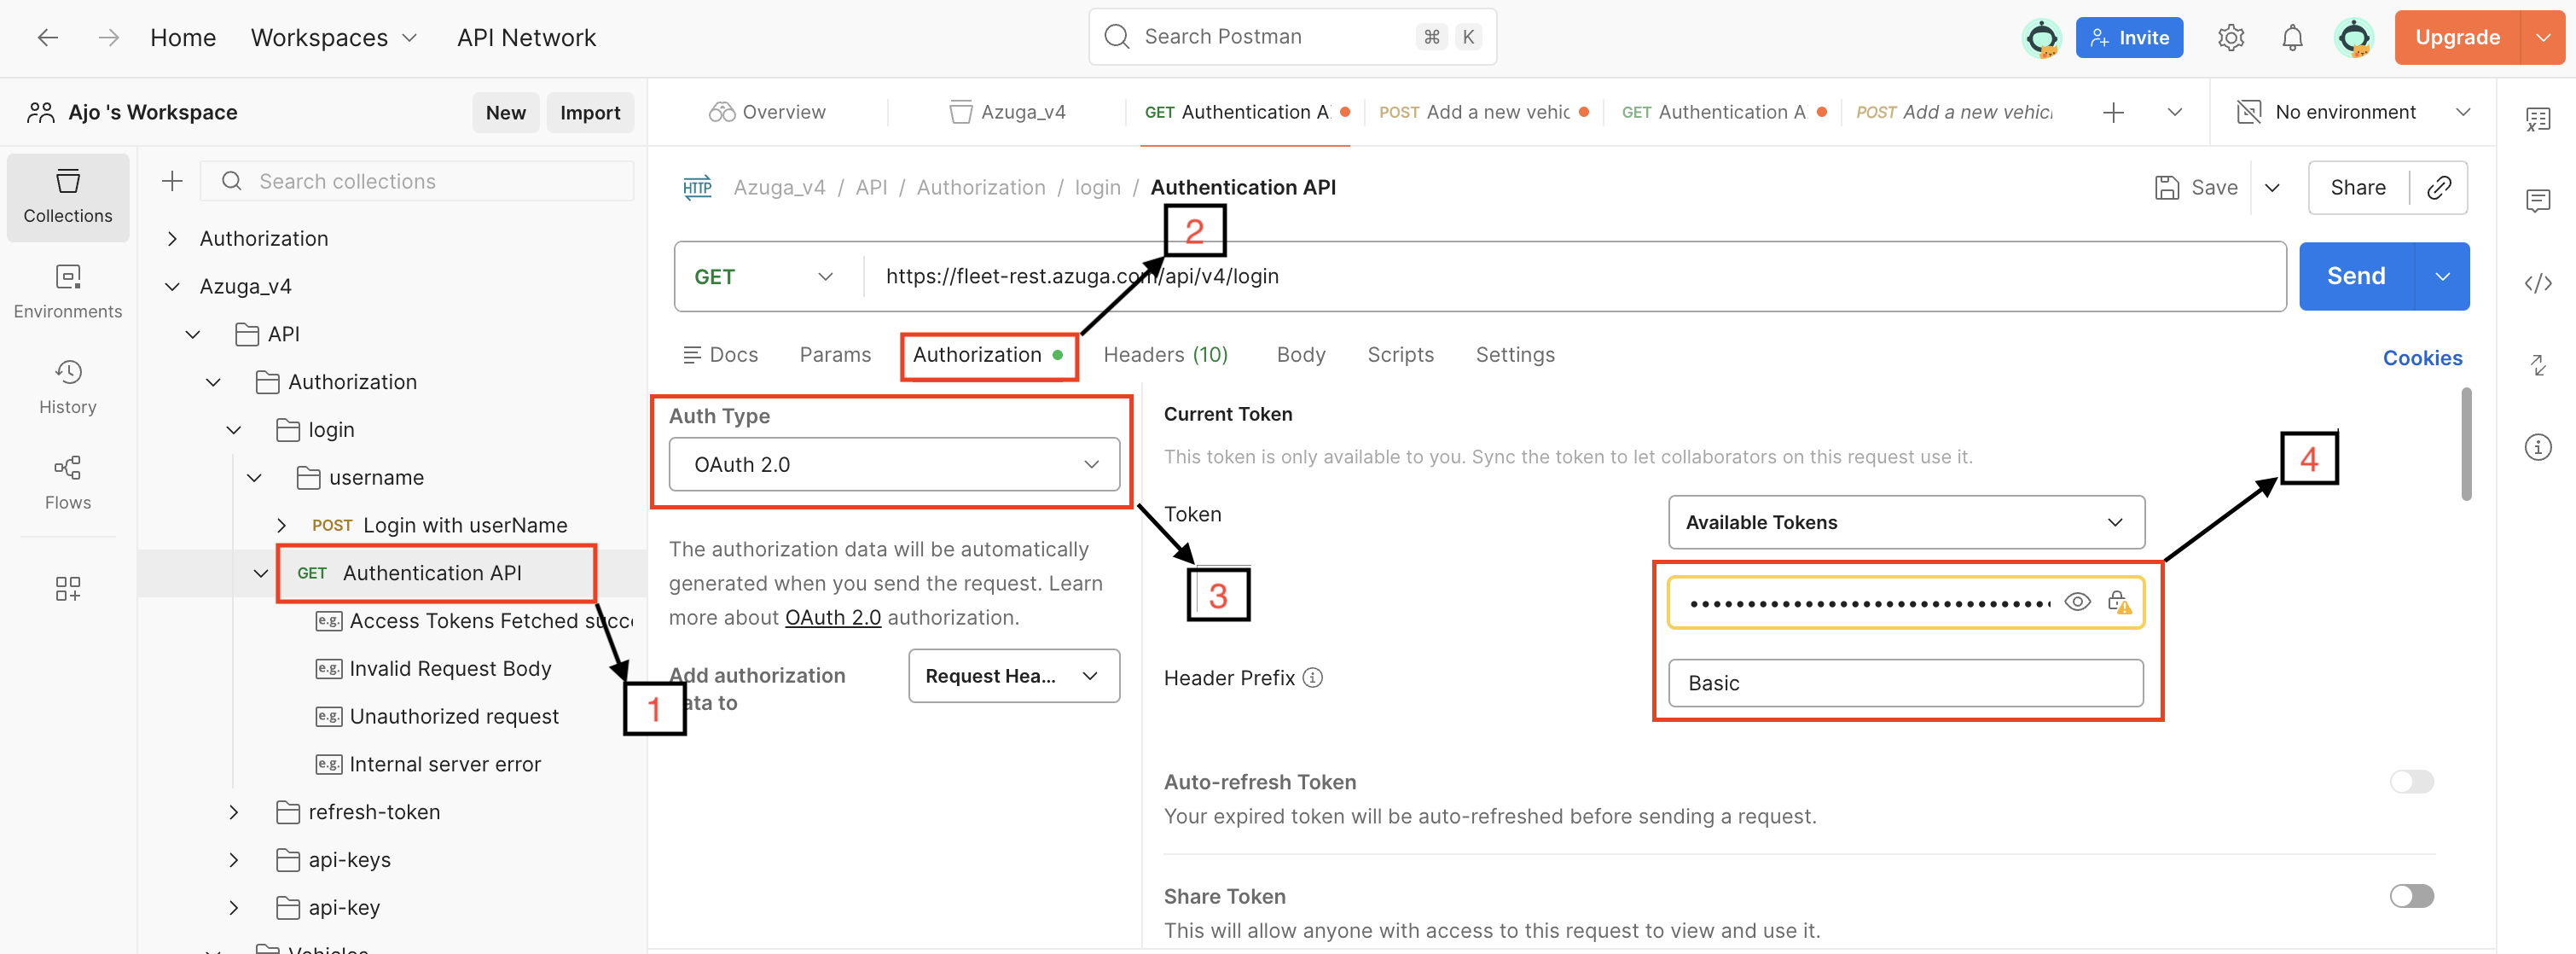
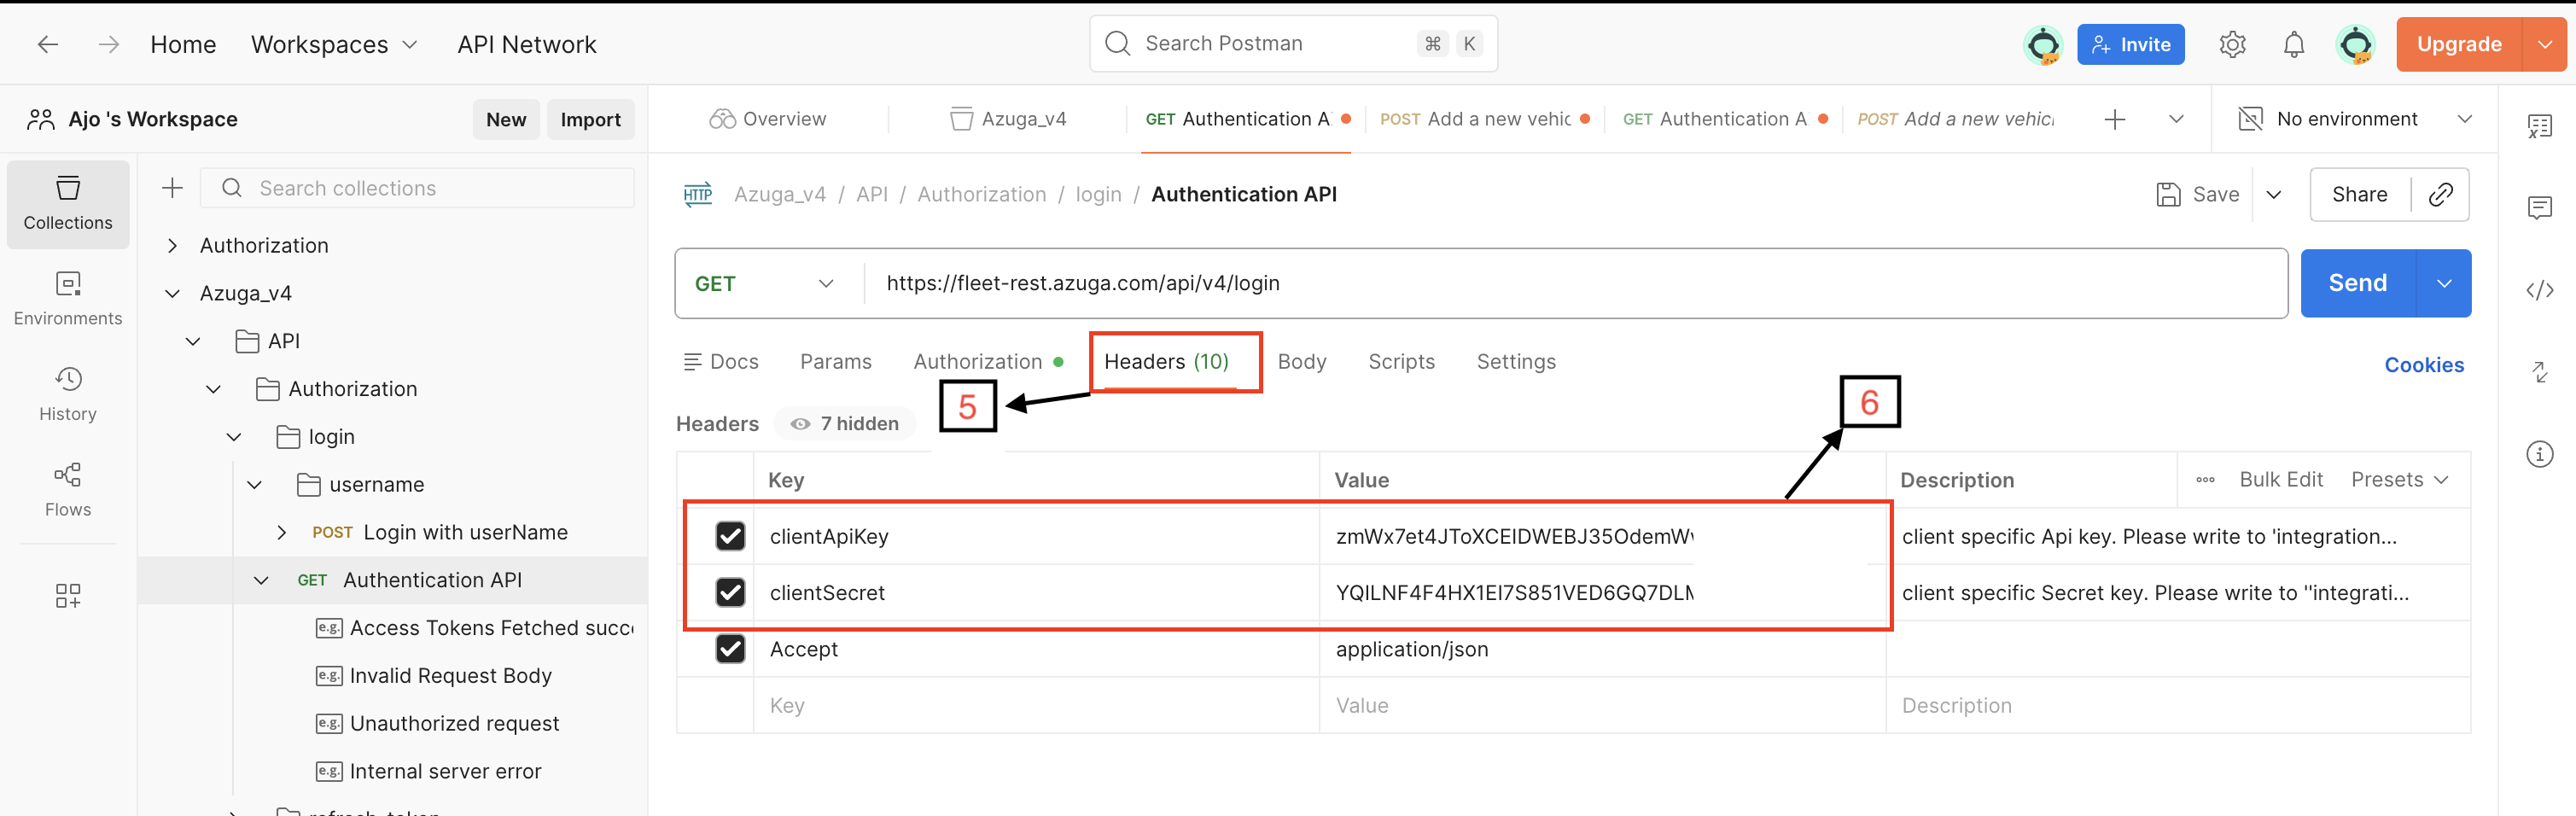
- Click Header tab to add the following header details.
- clientApiKey:Client-specific API key(Contact [email protected]
to obtain this) - clientSecret: Client-specific secret key(Contact [email protected]
to obtain this)
Step 6: Generate Access Token
- Click Send.
- On success, the response will return: accessToken, refreshToken, expiresIn.
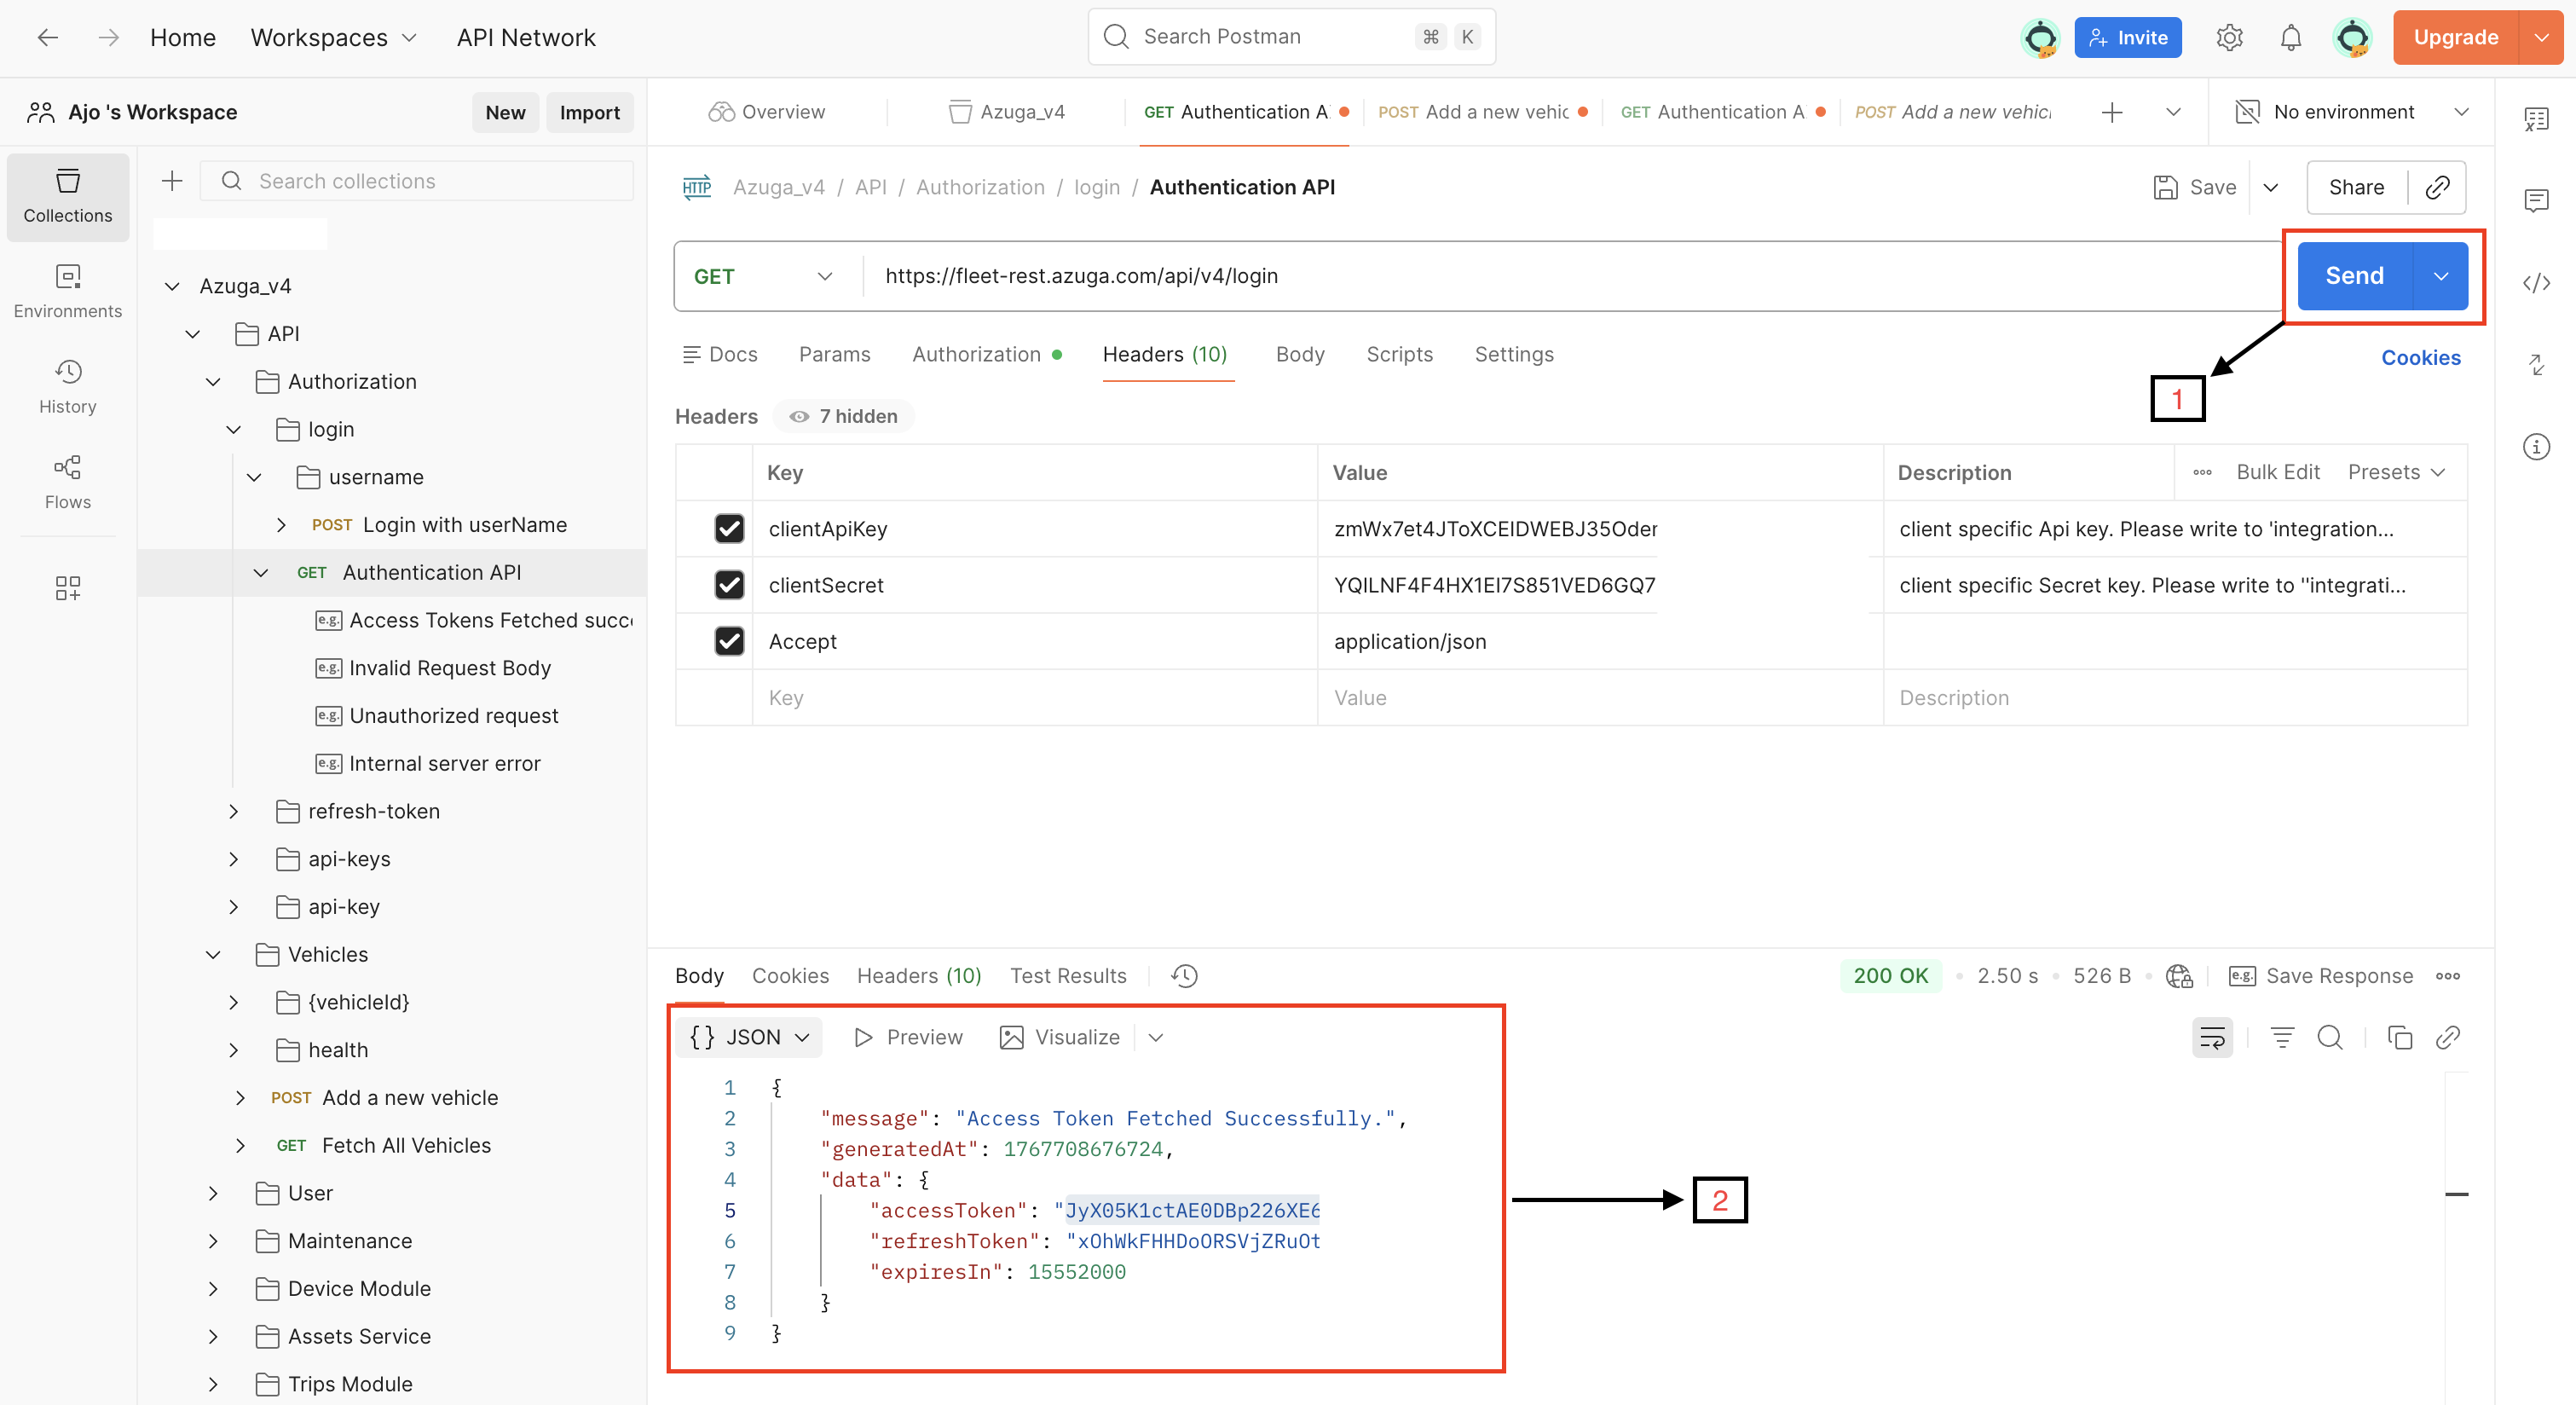
Step 7: BearerToken
Use the returned accessToken as a Bearer token in the Authorization header for all secured V4 API requests. For more information refer to Bearer Token
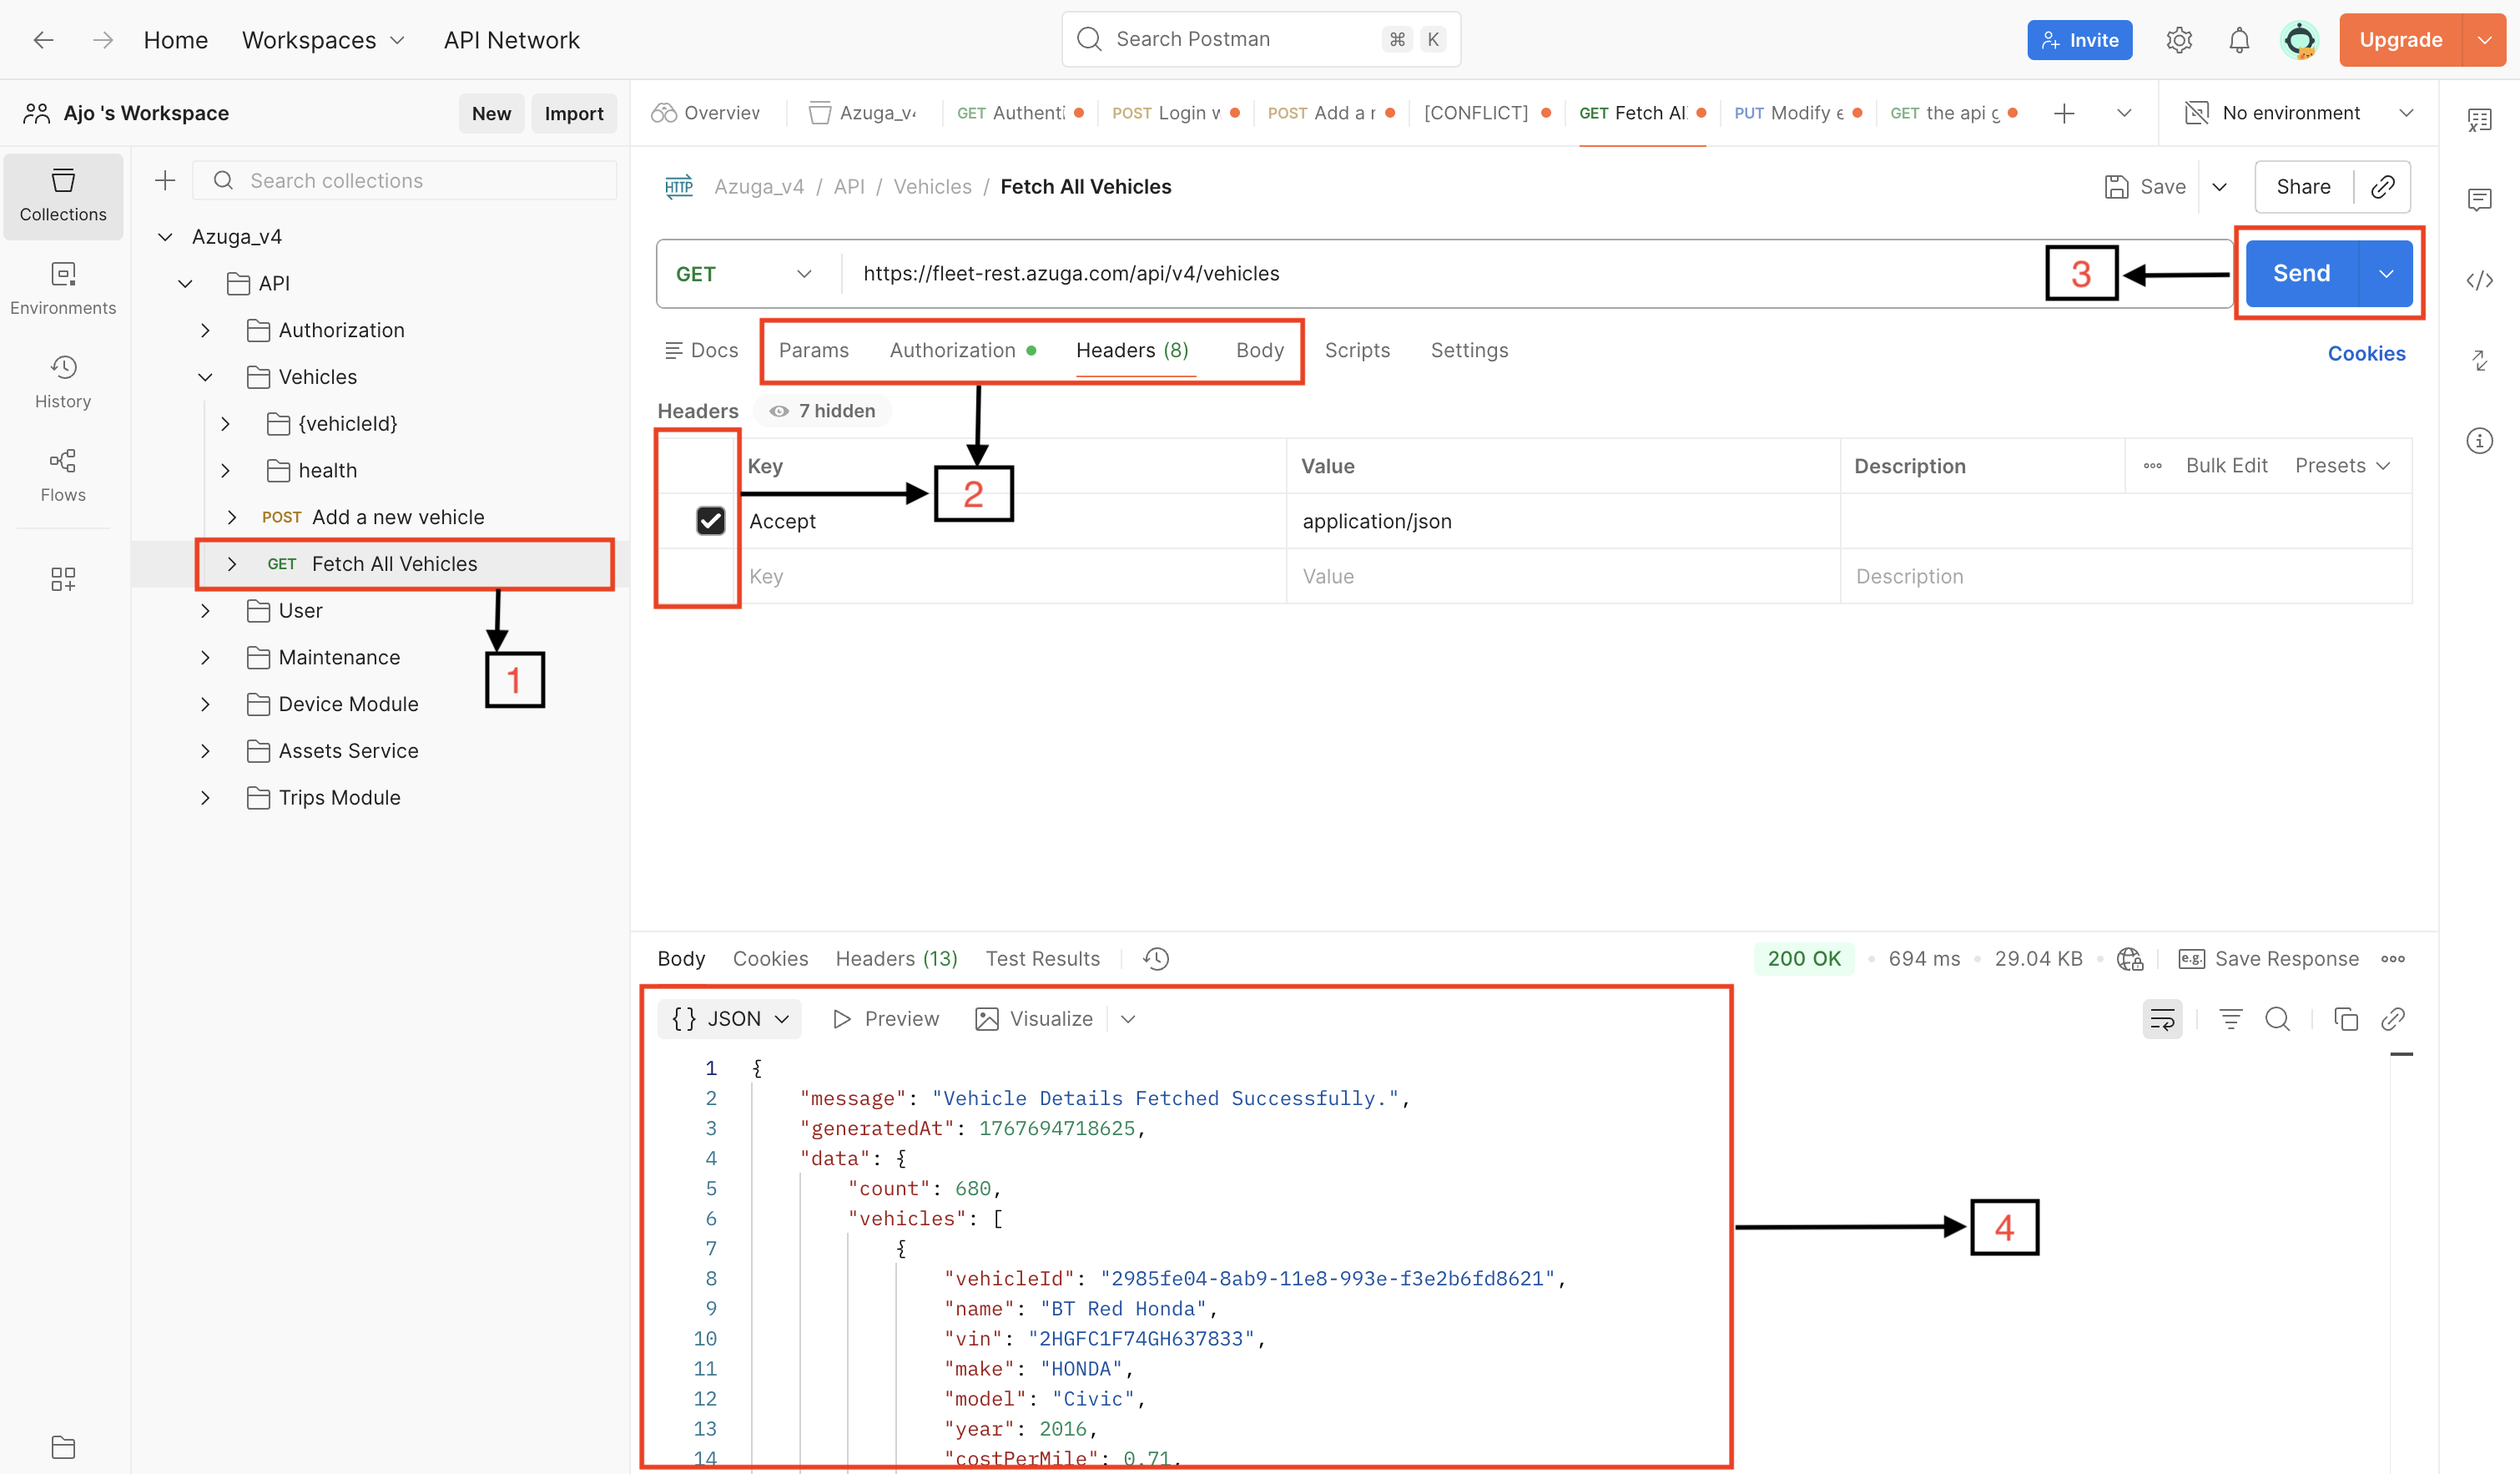
Step 8: Execute the API Request and View the Response
You are now ready to execute Azuga V4 APIs.
- From the Azuga_V4 Postman Collection on the left, expand the relevant module(eg. Vehicles) and select the API endpoint you want to test.
- Go to the Params or Body tab and enter the required values. If any optional parameters are not needed, make sure to uncheck them before sending the request.
- Click the Send button to execute the API.
- The API response will be displayed in the Response panel at the bottom.This confirms that the request was processed successfully and the API is working as expected.
Updated 6 months ago